
“A Rainbow of My Own” | a DIY mural + kids room redo

As often happens in households with kids, things move at a pretty fast pace around our house. When I slowed down long enough to look at my kids’ shared bedroom, I realized that beyond providing a place for them to sleep and store their clothes (and too many books and a few toys), the room hadn’t otherwise kept up with their needs and interests. As my daughter’s 6th birthday approached, I decided a (relatively) quick and budget-friendly DIY project would be a memorable gift – and fun for her little brother, too!
We’ve got a 1911 Craftsman-style house in Syracuse with 4 squarish bedrooms, and throughout the having-babies and working-from-home pandemic years, we’ve done a LOT of room swapping. Right now, our 2 kids (6 and 3) are sharing a former guest room. We endured a long phase of one-on-one soothing in the middle of the night for both kids (meaning between 2 parents and 2 kids, everyone was up at some point in the night 🤦🏼♀️), we decided to put the kids together for nighttime snuggles! It’s been working like a charm, and it also means they share a full-sized floor bed, which needed a little jazzing up.
Before getting too far into the weeds, I approached the overall project by rethinking the design and function of the room. In most cases, stopping to think – about what the room USED to be, and how that’s different from the function you want from the room NOW – will give you a wealth of information! Here are some questions to ask yourself about simple changes you can make:
what (if anything) can be taken out? Starting with the guest room phase of this room, we’d been storing our own (grownup) books, CD’s and craft supplies on the upper shelves of the bookcase, which looked cluttered (and meant we couldn’t access things as well when the kids were playing or sleeping in their room). And of course, taking out the outgrown clothes and toys helped a ton!
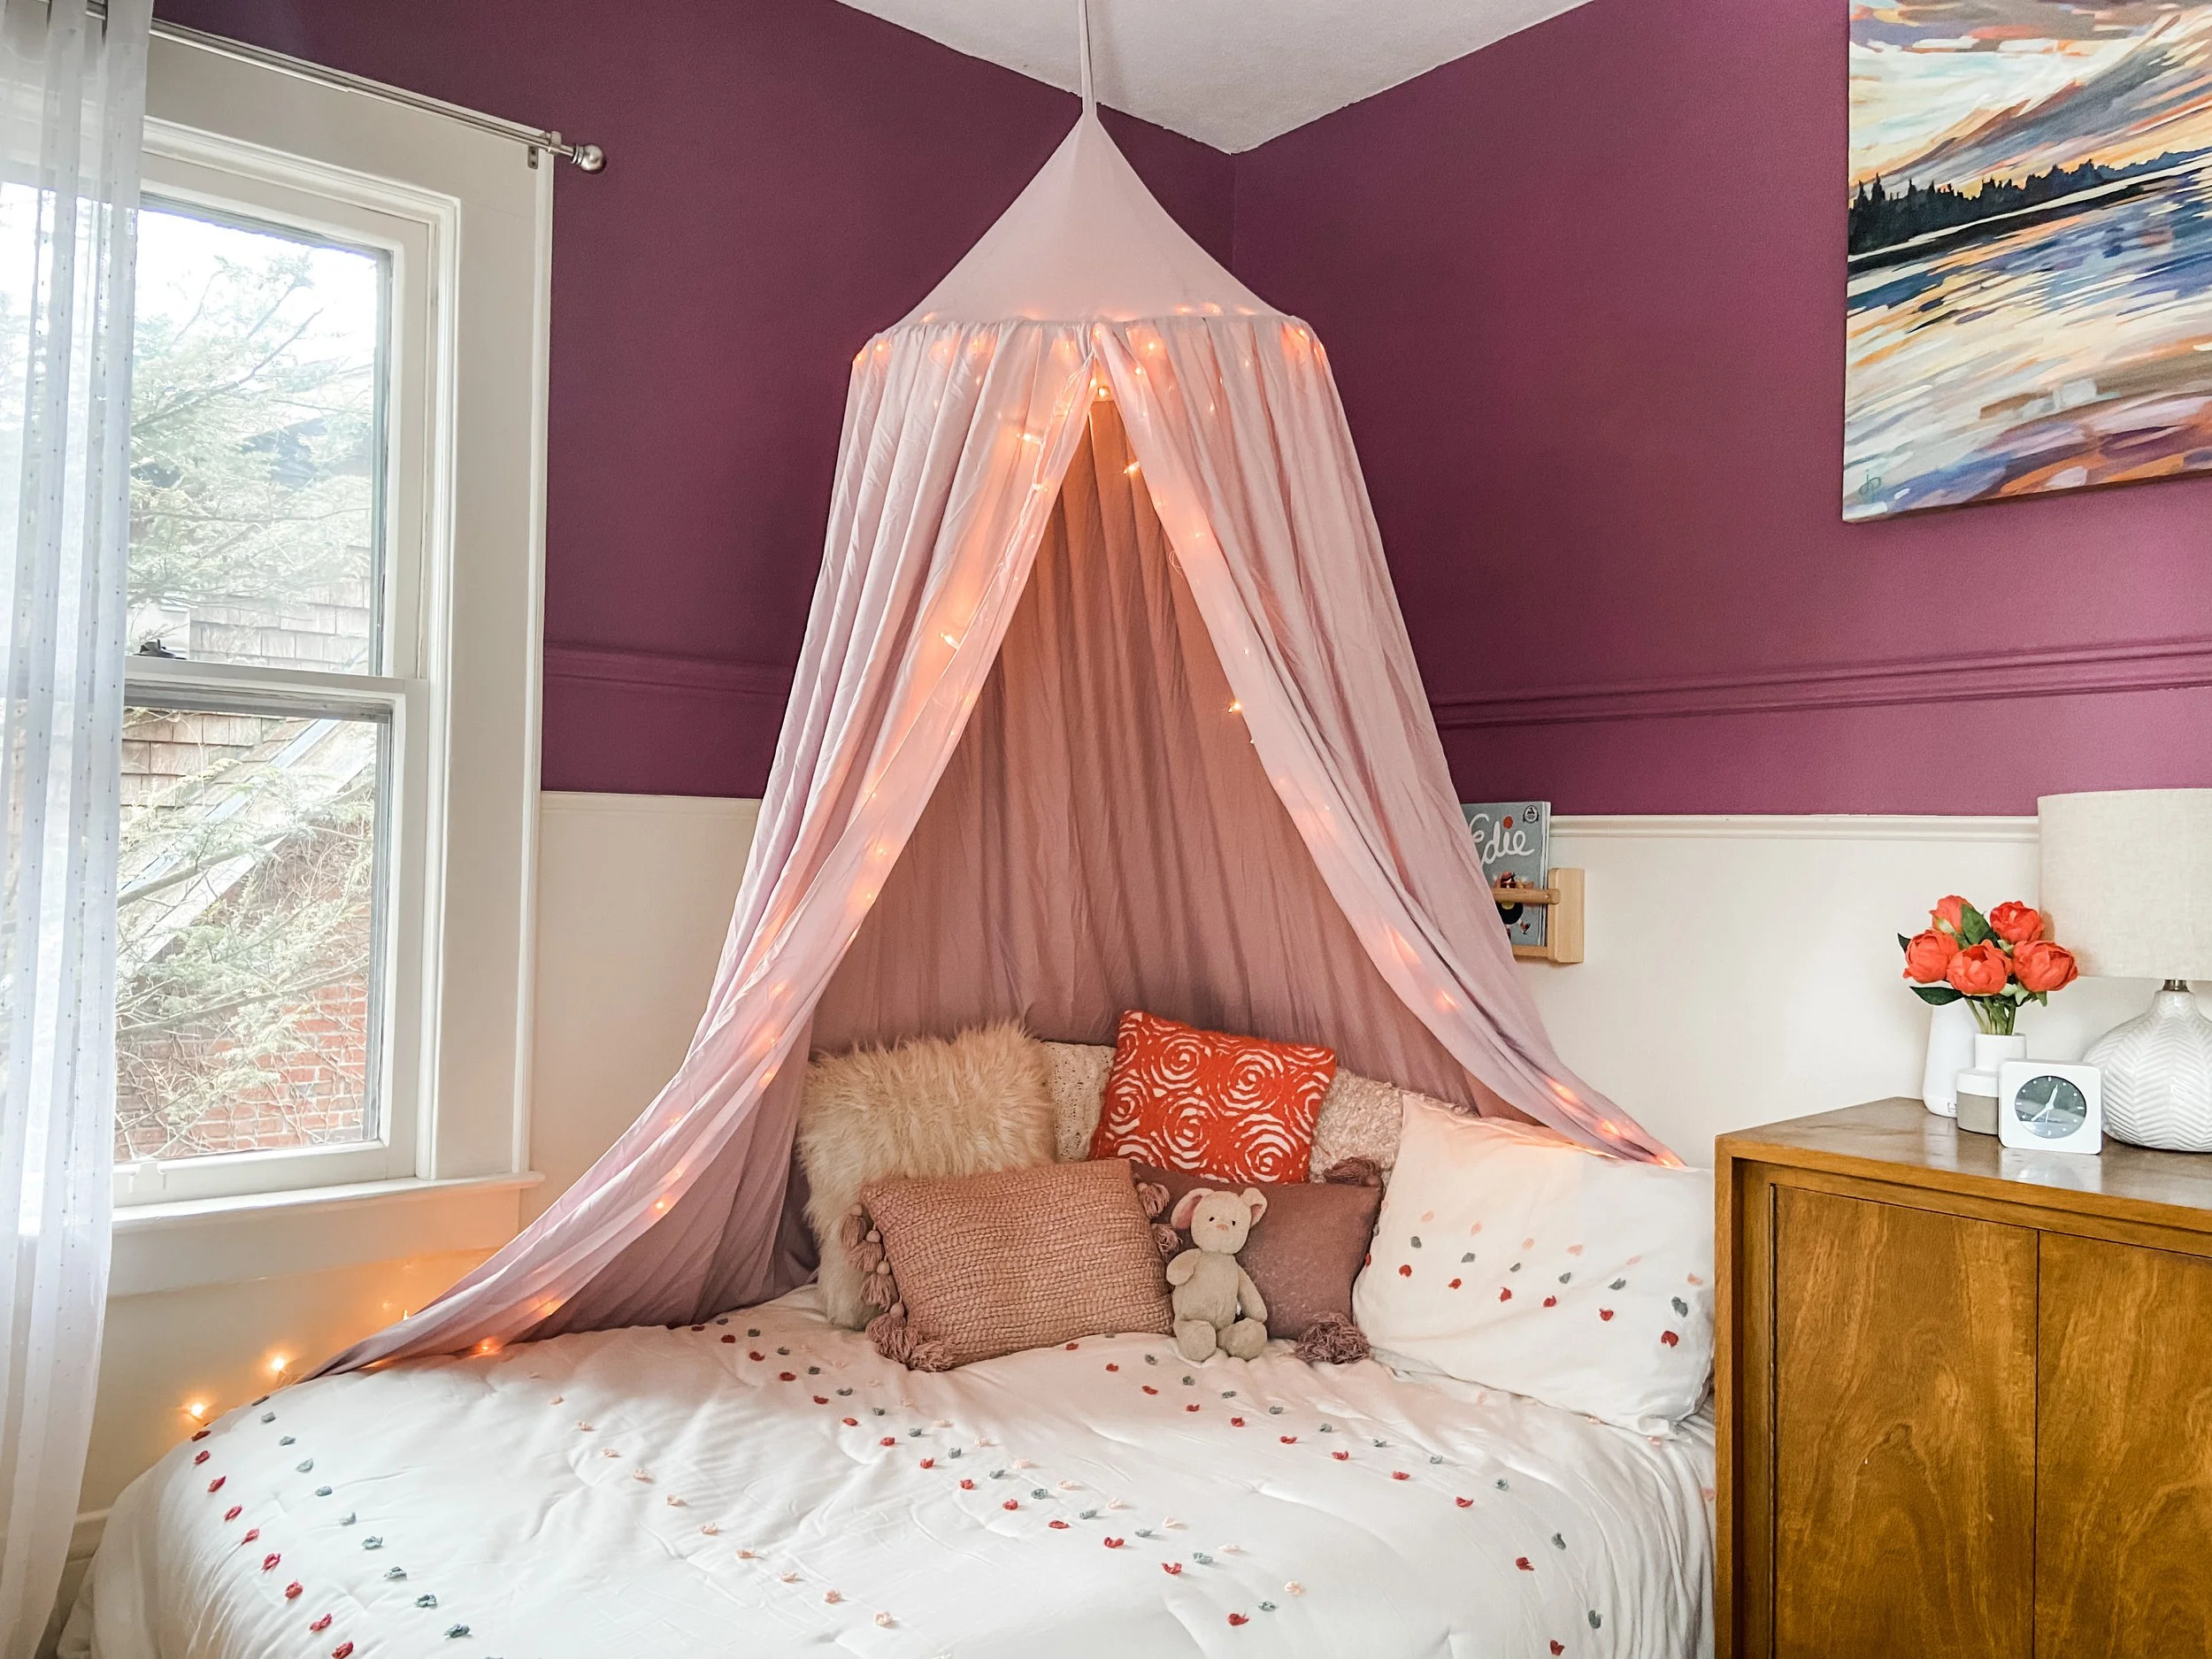
What’s going to serve your updated needs (and spark a little joy!)? In the case of this room, swapping light pink walls for purple – and adding a rainbow – was a MUST (purple and rainbows being my daughter’s current favorites)! The bed and artwork also needed an update in order to make the kids’ room feel like it was truly theirs, as well as the shelves with more space for their more-current things.
What do you already have that can be repurposed? Most items that I used to style their bookshelves and walls were already in the house! I looked at a few other styled kids’ room shelves for ideas – globes, framed graphic art, baskets, neutral stuffed animals and wooden toys were common themes, and we already had them! Giving those things more breathing space on the bookshelves (by getting rid of the items that didn’t belong there) helped to elevate the way they looked. And of course, being an artist, I had a perfect art piece, “Mirroring”, to bring out the new color scheme and set a calming tone for the room!

“Mirroring” in its perfect purple setting

Shelves with function and a little pre-owned style

Now, on to that mural! It was a fairly quick (aka single afternoon) project, and I started with that same “what do I already have that I can use for this?” question to get the ball rolling!
Use your leftover paint: I knew I didn’t want a bright, primary color-based color palette, but something a bit more muted and calming. Turns out that we had PLENTY of paint on hand that we’d used in other rooms over the years, so I started there. The only color I purchased just for this project was the (new) purple!
Spend more time taping than painting (and re-tape if necessary): I decided to eyeball this mural – which gives it a more handmade/kid-friendly look, and also cuts down on the time I would have spent measuring exact angles and perfecting straight lines. This meant that the taping was truly the most important part! I started with the ceiling as the top of the rainbow, and worked my way down on either side, taking care to step far back as I went. You’ll see (below) that I re-taped the left side of the rainbow after noticing it looked a bit lopsided!
Have the right supplies on hand: I used these mini paint rollers (4”) and brushes, which worked perfectly for filling in the rainbow stripes. Frog tape is also super adhesive around the edges without taking any paint off upon removal, which was ideal for this project. The 1.88” width was just what I needed to separate the colors!

The first tape stripe in place

a bit more…

…all of the stripes are taped! But it’s lopsided…

…that’s better!

Painting in progress…

…and done! Now to wait a bit for drying time

Tape removed and ready for the grand reveal!
Here’s a quick list of the colors in the mural:
Coral/red: Sherwin Williams 6874 “Ardent Coral”
Light Pink: Sherwin williams 6610 “Koral Kicks”
Green: Valspar 6007-6A “New Avocado”
Light blue: Behr (PPU12-9) “Frozen Pond”
Dark blue: Sherwin Williams 7602 “Indigo Batik”
Purple: HGSW 6284 “Plum Dandy”
White: custom color match to our trim/baseboards

And here are links to a few of the other things shown in the room!
Bedding: Pillowfort Pom Comforter set (White, Full size)
Bed canopy (in pinkish purple)
White string lights (sewn into the canopy)
When I surprised them with their “new room”, both of our kids were THRILLED! The 3-yr old remarked “A RAINBOW OF MY OWN!” (the title of a favorite book of ours by Don Freeman, author of the Corduroy books) – and that comment alone made all the effort totally worth it! 😅
A project like this doesn’t have to be overwhelming (or time-consuming OR expensive)! Be sure to join my email list to stay up to date with other blog posts on totally achievable, approachable DIY projects, modern landscape artwork, and thoughts and tips on styling your home!